Step by Step Instructions
Chocolate Crust
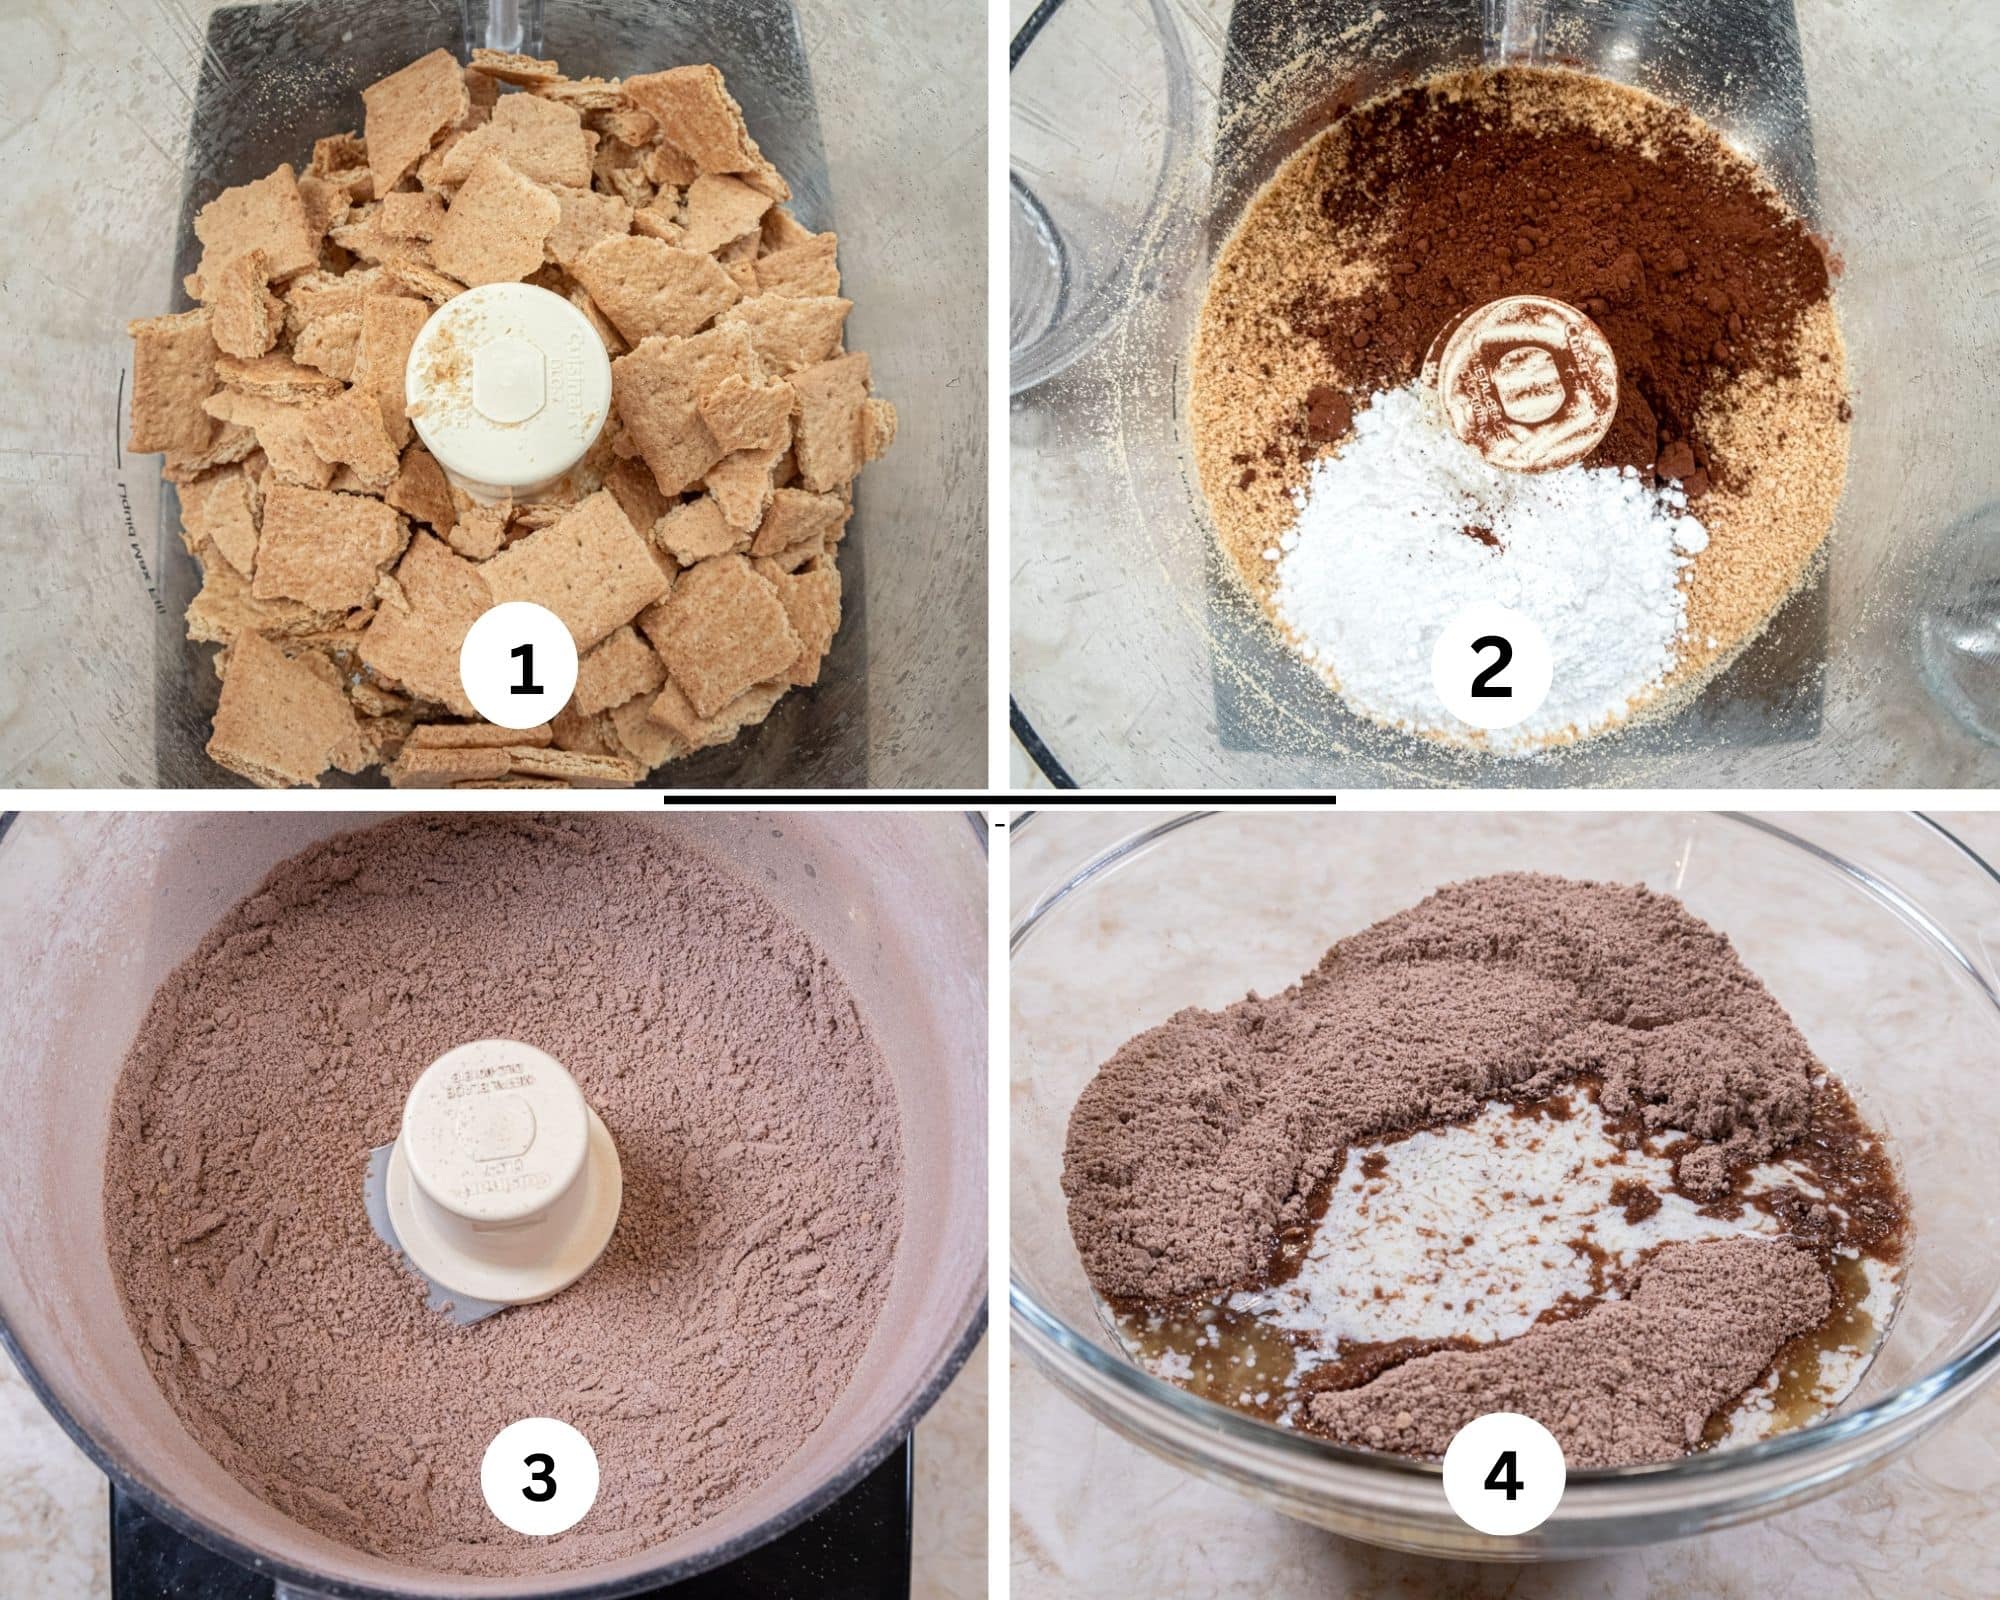
Step 1. Crush the graham crackers and place in the bowl of a food processor. Step 2. Add the powdered sugar and cocoa powder. Step 3. Process to make crumbs. Step 4. Transfer the crumbs to a bowl and add the melted butter.
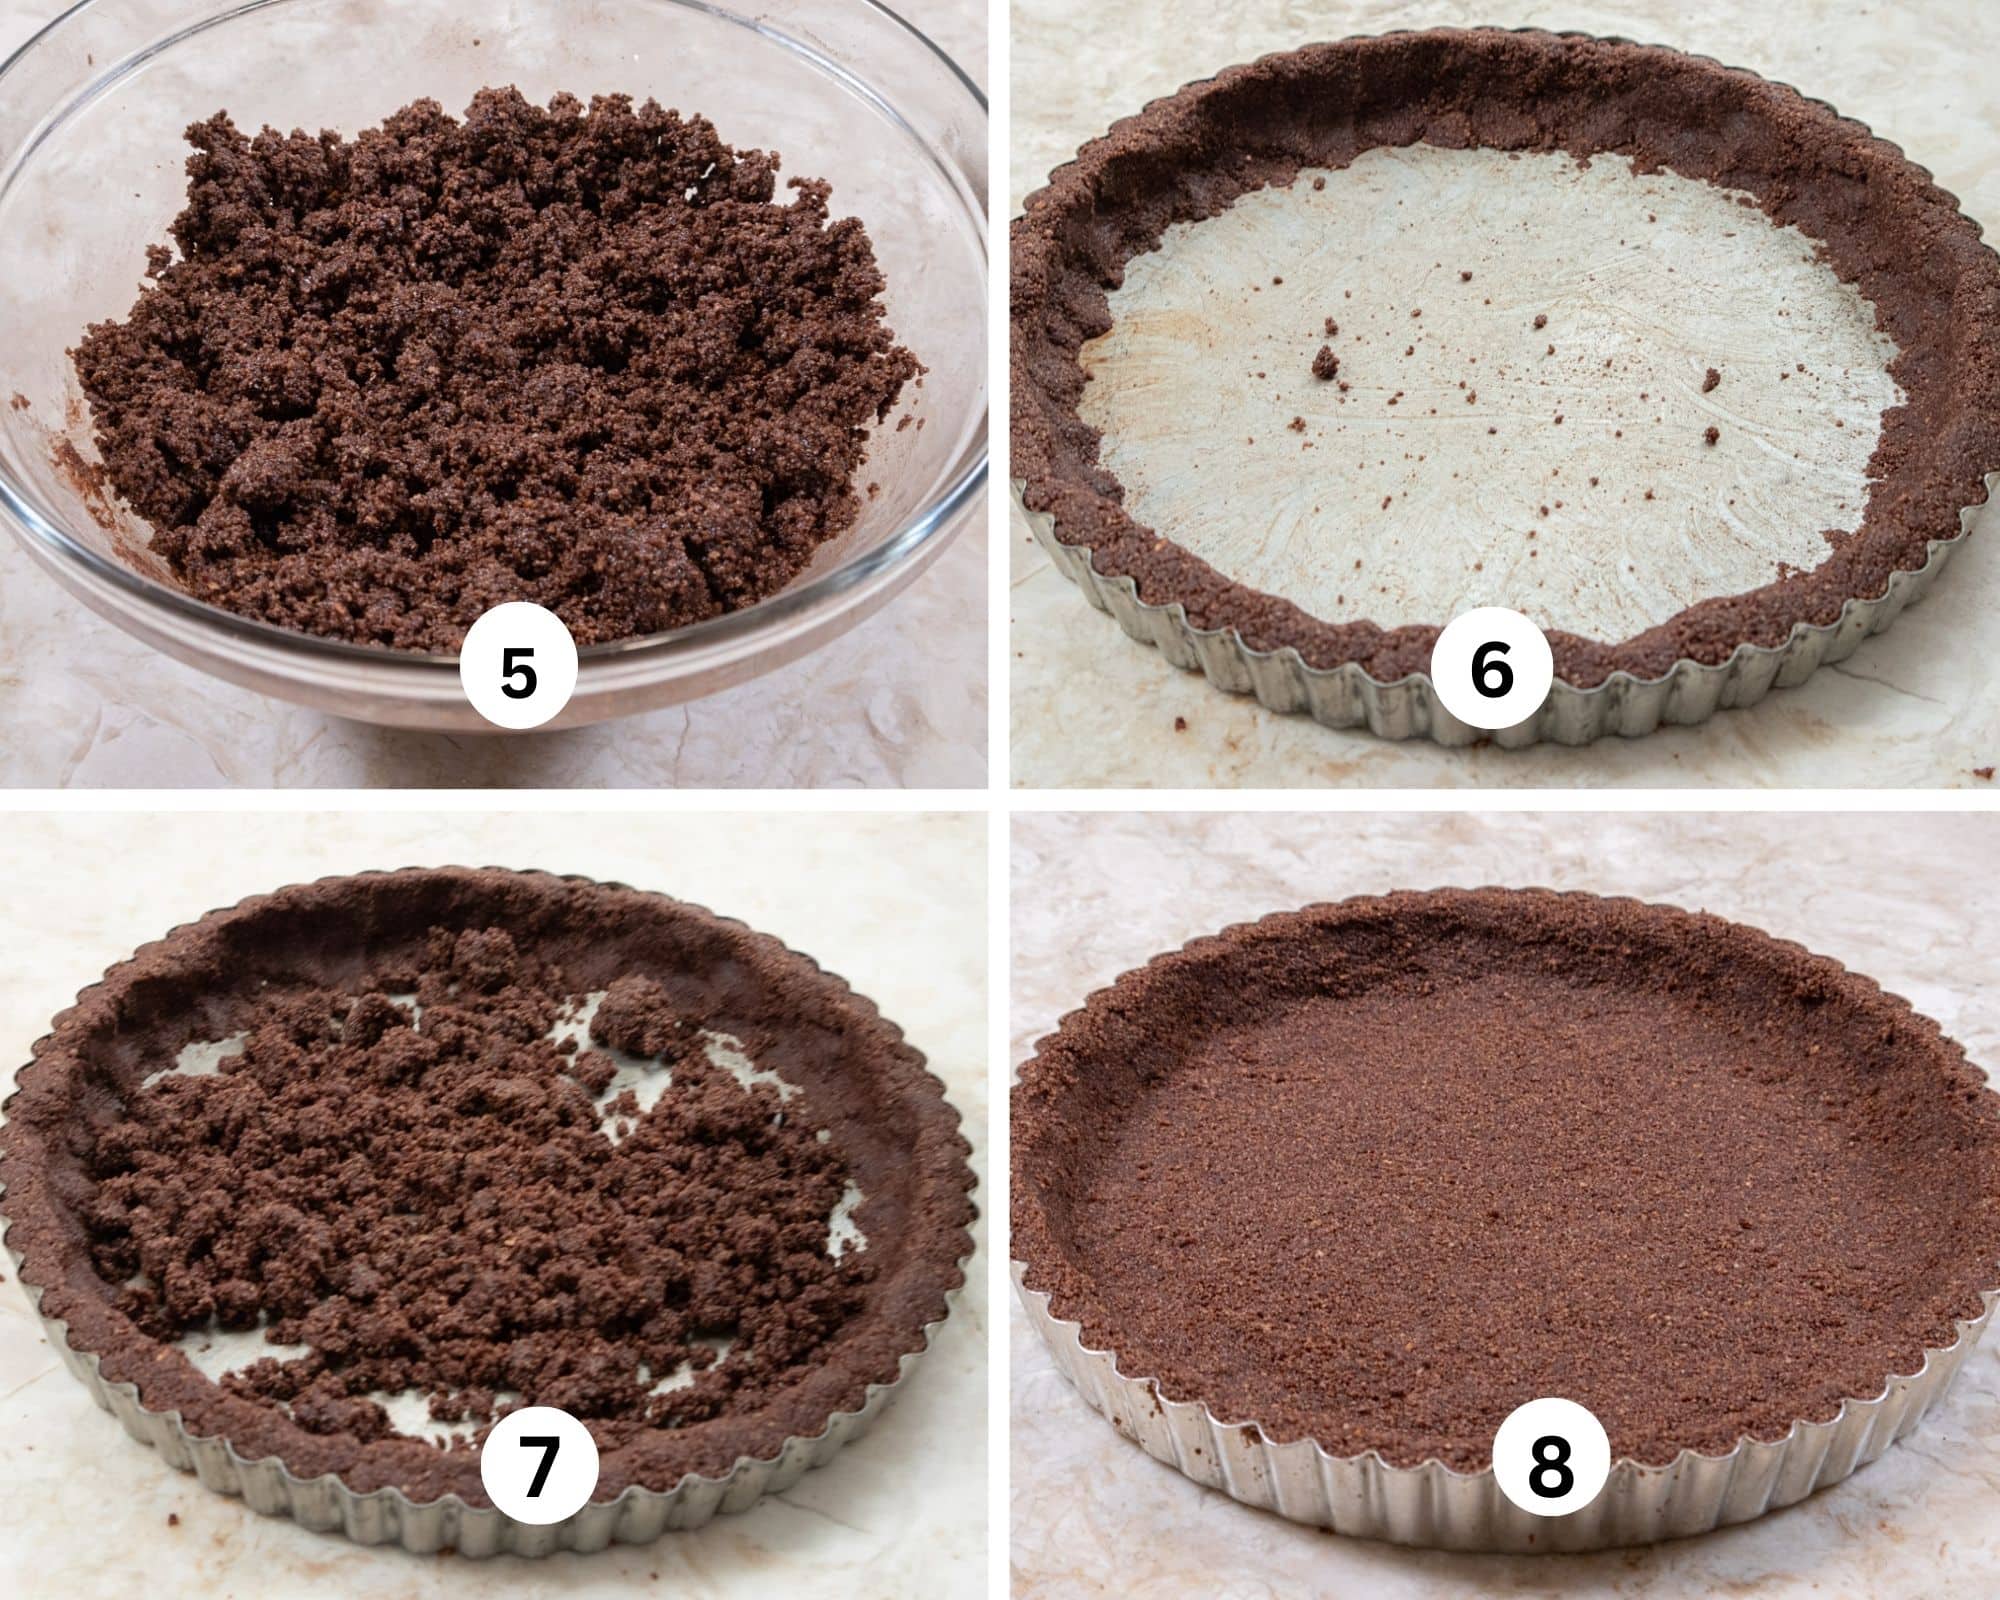
Step 5. Start with 8 tablespoons, and using a fork, toss the crumbs and the butter together until completely mixed. Take a small amount and press it together between your fingers. If it sticks together without falling apart, it is fine. Otherwise, add the remaining butter. Step 6. Spray the bottom of the tart pan with a non-stick baking spray and press ⅔ of the crumbs evenly and firmly around the edges of the pan. Step 7. Spread the remainder of the crumbs evenly on the bottom of the pan. Step 8. Press them in firmly and make sure they are attached to the sides of the crumbs. Set aside.
Café au Lait Filling

Step 1. Place the heavy cream and coffee in a medium size pan. Step 2. Heat together until steaming, but do not boil. Step 3. Remove from the heat and submerge the chocolate under the cream. Leave it there for 4 or 5 minutes. Step 4. Stir together with a spoon until blended. Do not use a whisk as it will make too many air bubbles that are hard to get out.
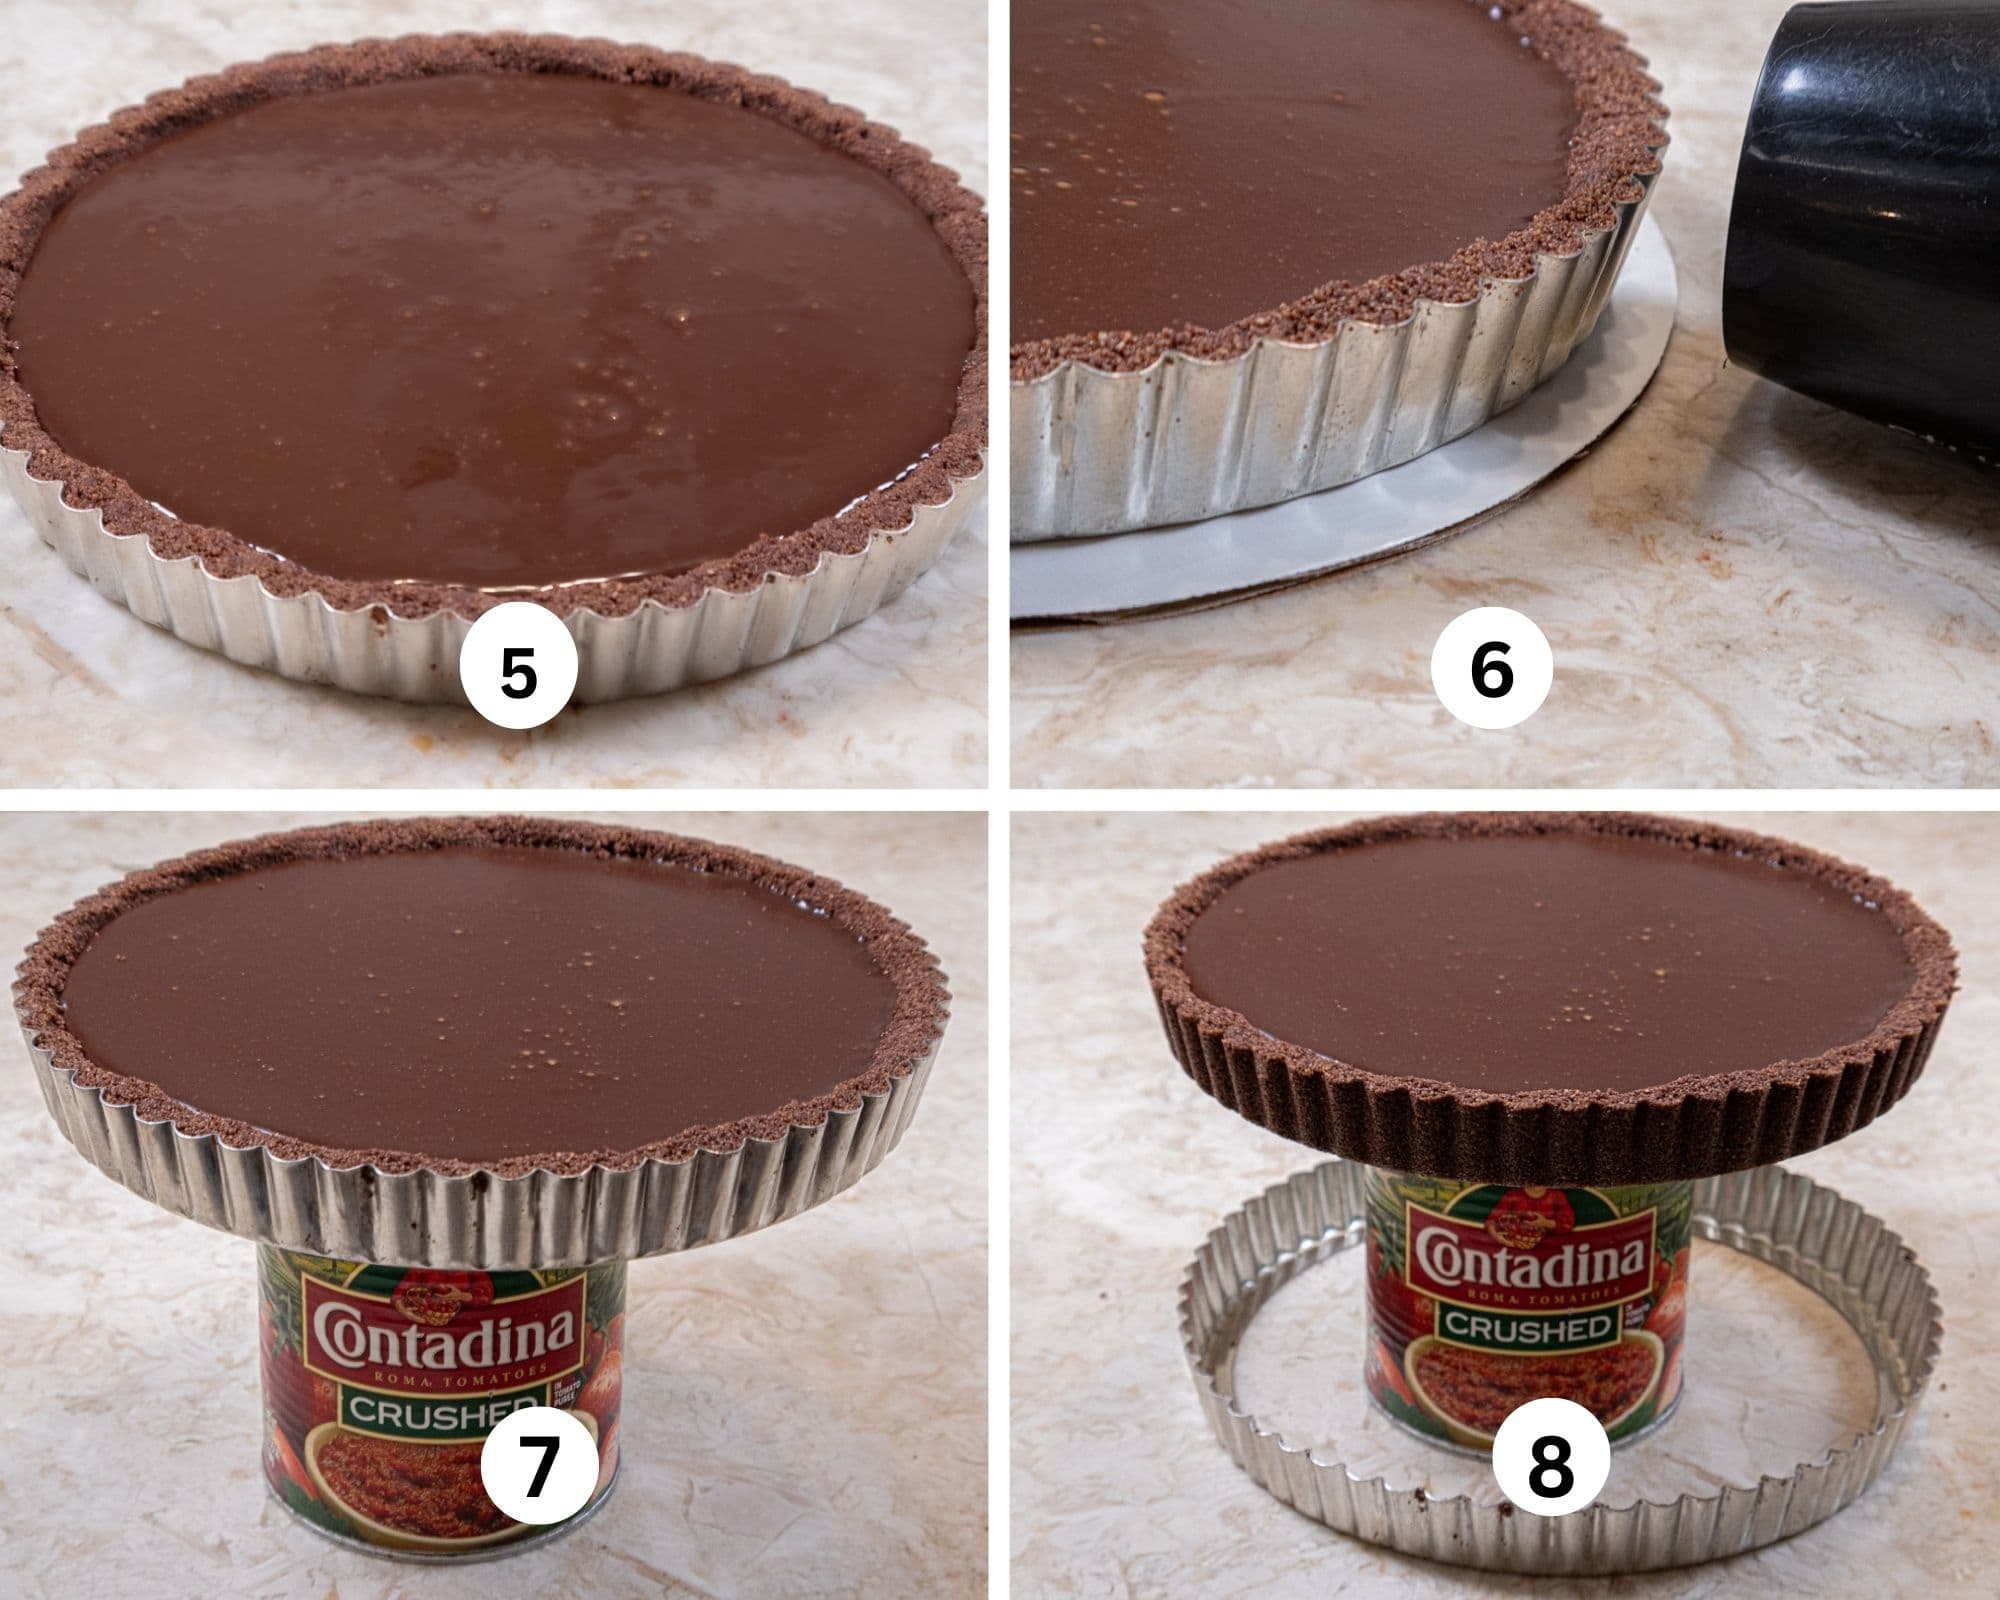
Step 5. Pour the filling into the prepared shell and refrigerate. Step 6. To release the tart from the pan, place a blow dryer about ¼ to ½ inch away from the edge and go around the entire tart to heat the crust. Just slowly turn the tart while heating it. Step 7. Place the tart on a large can to elevate it. Step 8. A gentle tug on the rim of the pan will release it.
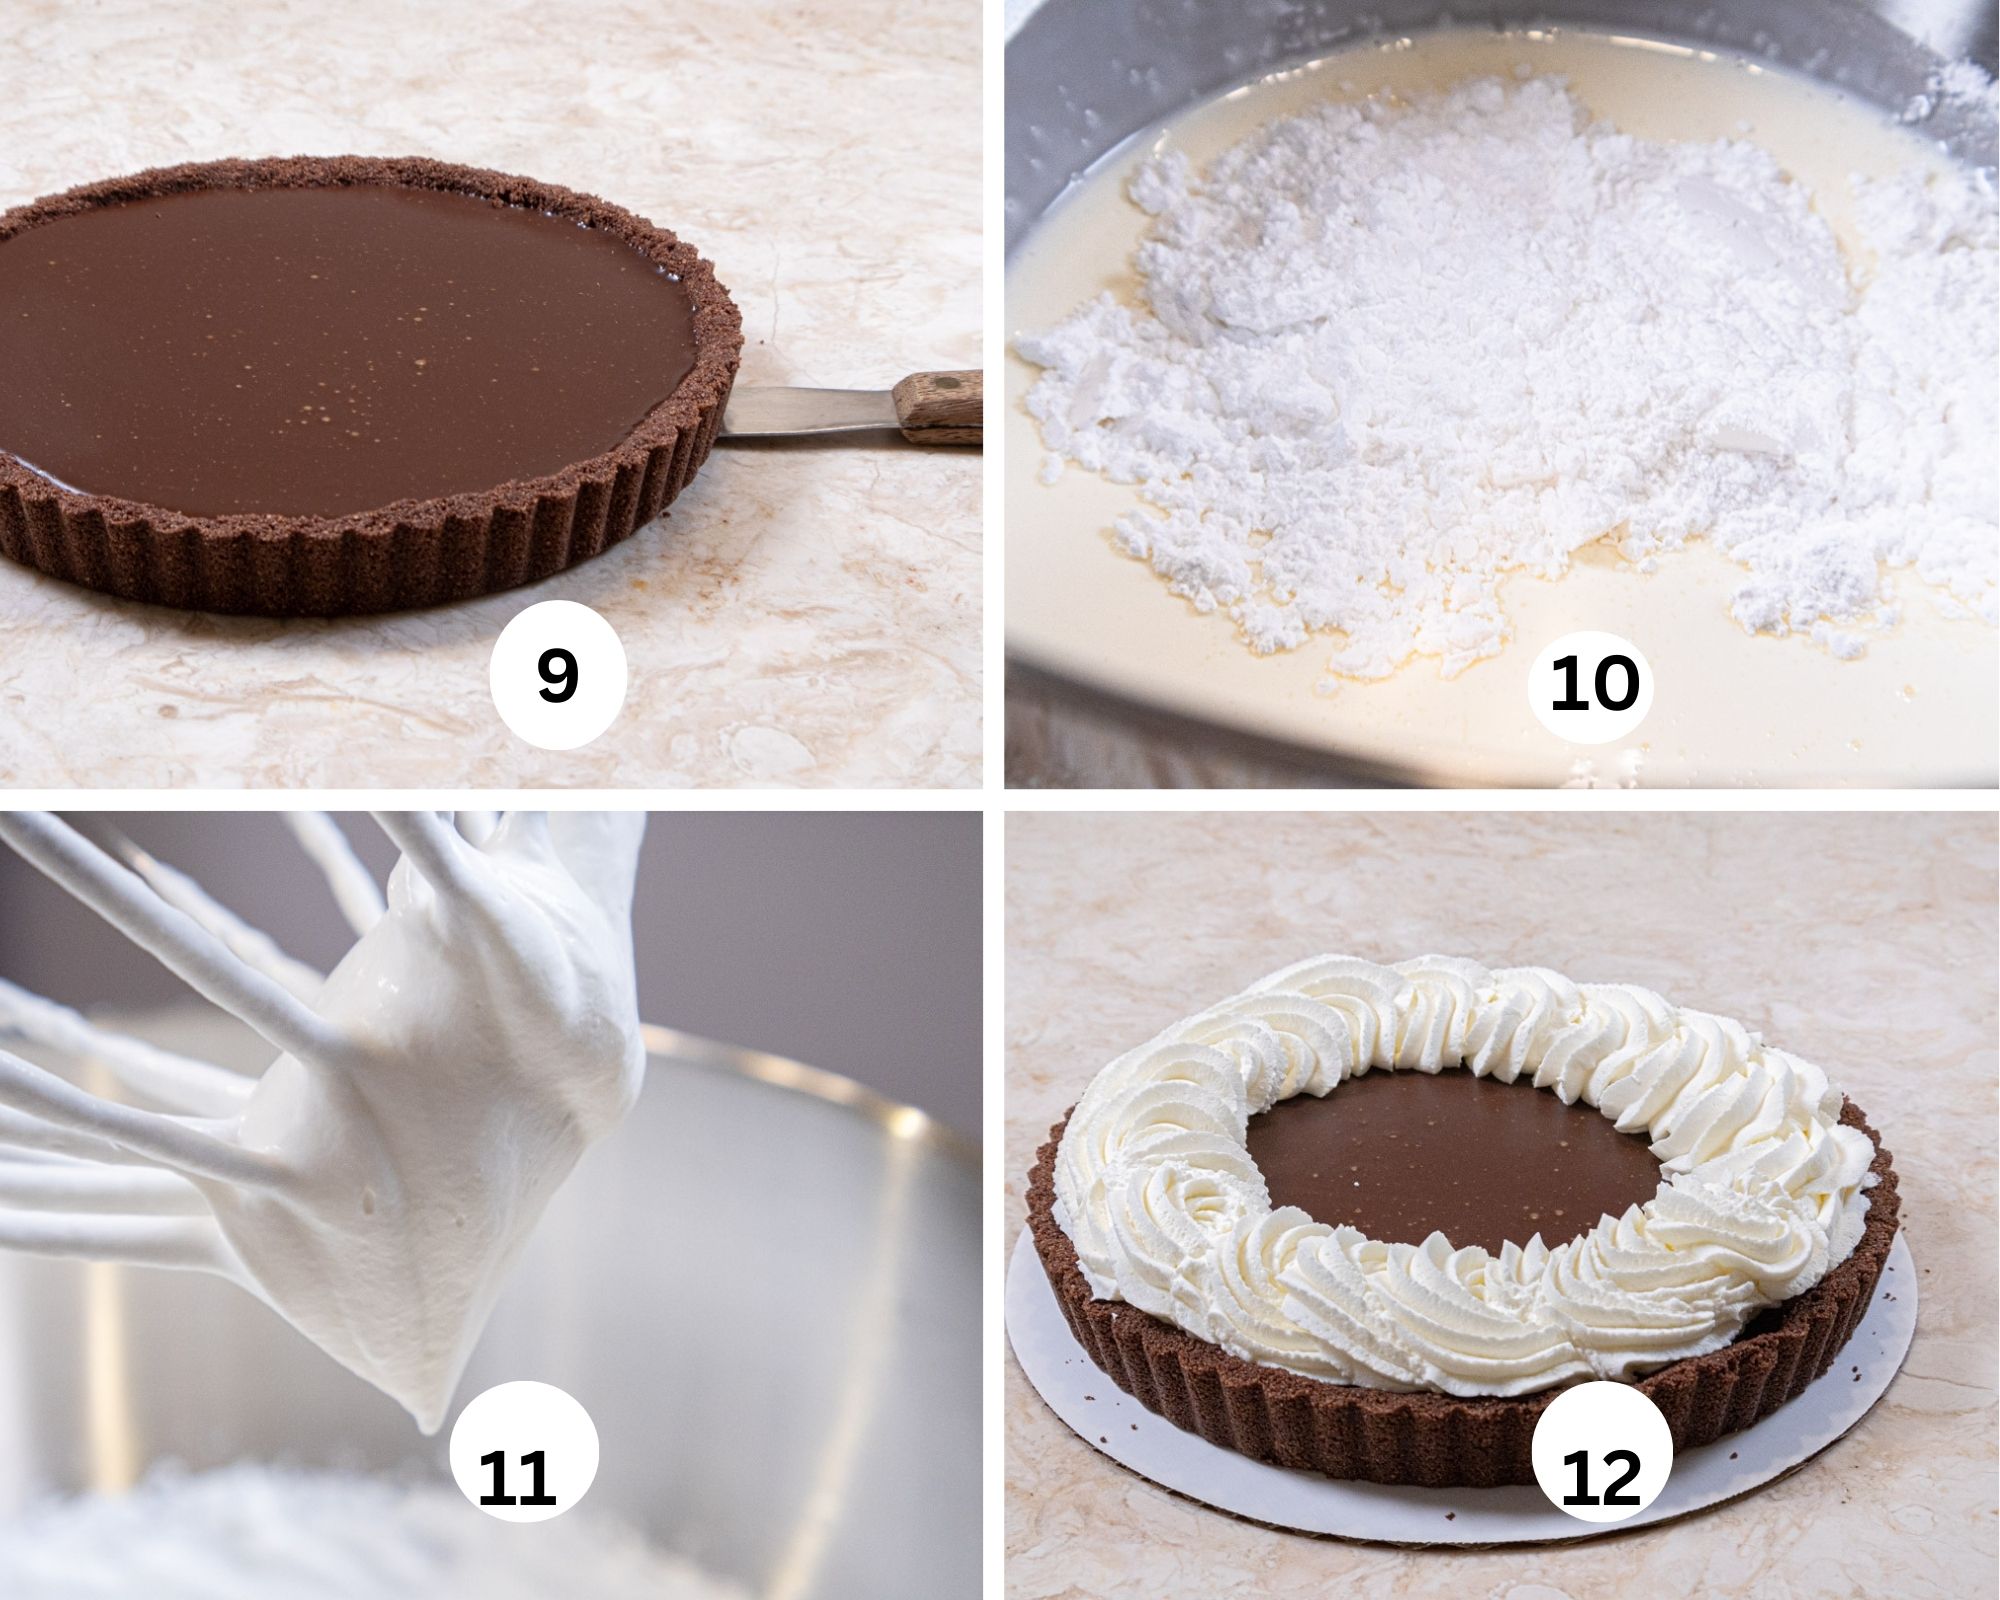
Step 9. To release the bottom, place a flat, metal spatula between the bottom of the crust and the metal base of the pan. Go around the entire base and then lift it onto a cardboard circle or plate. Step 10. Place the cream and powdered sugar in the bowl of a mixer. Step 11. Whip until stiff. Step 12. Pipe a wreath of cream around the edge of the tart. At this point, it should be chilled or frozen. If frozen, it is easier to leave the cream off until a day or two before serving. It can be thawed in the refrigerator and then the wreath can be added. Just before serving, sprinkle cinnamon over the whipped cream with a fine meshed strainer.
Source link
#Café #Lait #Chocolate #Tart
